How to Integrate MailChimp In Elementor
- Abhinay Kumar
- Plugins
- February 5, 2022
Looking to establish your e-mail marketing service with subscribers. Email marketing is one of the most sought-after ways of marketing. Besides having a list of subscribers is crucial to the regular blog content that you publish. You can get an idea about the success of your email campaign from people’s responses. There are several tools to implement e-mail subscriptions. One of the best ways is integrating MailChimp with Elementor. Mailchimp Elementor integration helps in getting the desired layout without much effort. All your elements are at one place which you can customize in Elementor and integrate MailChimp with Elementor. You can do it through a form or you can use a popup builder. In this, I am going to show how to implement it both ways.
What is Mailchimp?
MailChimp offers an email marketing service. It helps in creating and managing email campaigns. You can integrate it with Elementor forms and popups to help you store email subscriber records. It helps in creating and running customized email campaigns for your blog or website.
How to integrate MailChimp in Elementor through an Elementor form.
The first step is to Register Mailchimp with Elementor.You can do it through the Elementor settings.
Click on Elementor–>Settings.
Click on the Integrations tab.
Go to the MailChimp section and enter the API key.
Click on save changes.
Mailchimp API key can be obtained as follows.
Register your account on MailChimp.
Login to your account.
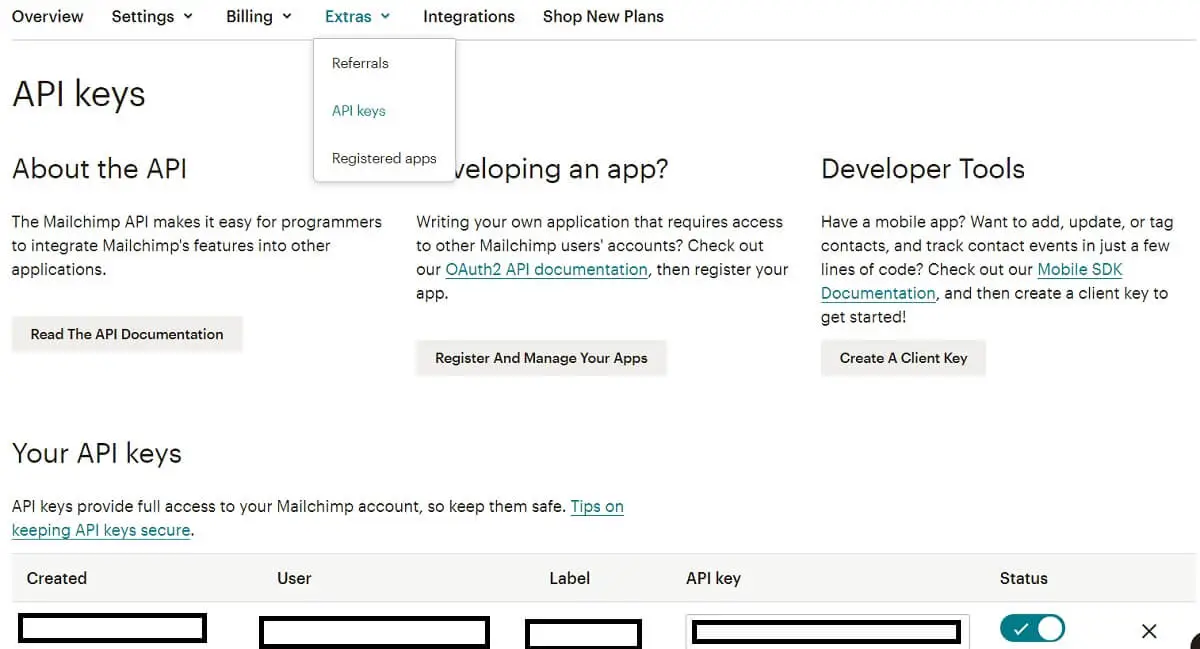
Click on the image in the left-most lower corner and select Account.
Click on Extras and click on API Key.If you do not find one there. Click on create and create an API key for you.
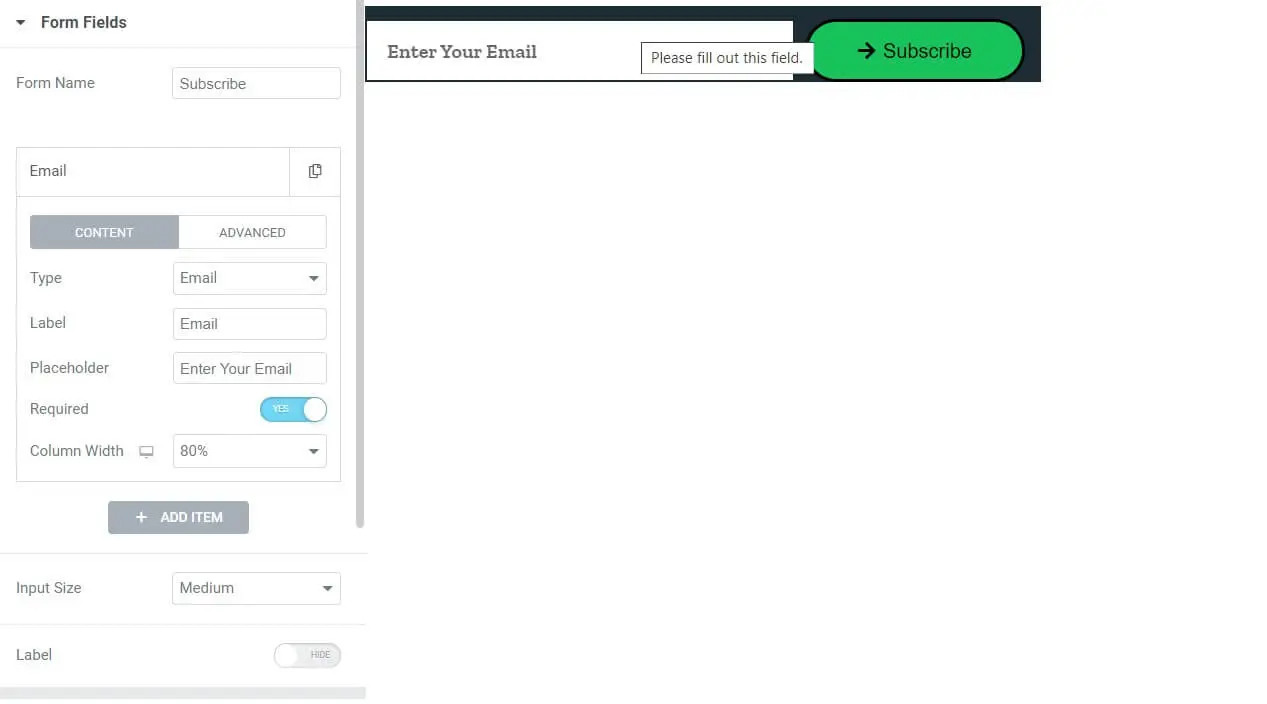
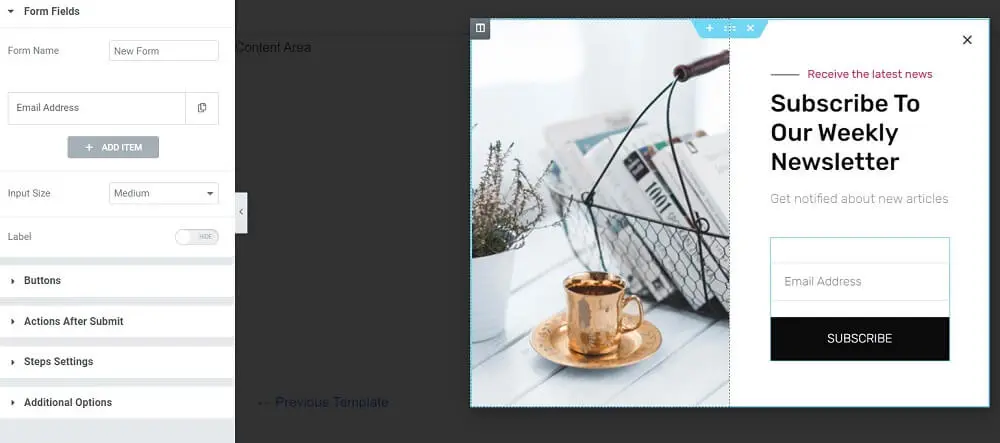
Now Open Elementor and search the Elementor form widget from the search Widget Area.Drag and drop the form widget in the area you want to implement your form.For illustration purposes, I have put the form in the footer area.Let us implement a simple subscribe form and integrate it with MailChimp.Choose a one-field form. Select it as an email. Here the user is going to enter the email id and click on subscribe and the user will get subscribed to your blog/website.So after selecting your form, select your button from the buttons area.Name and design your submit button here.
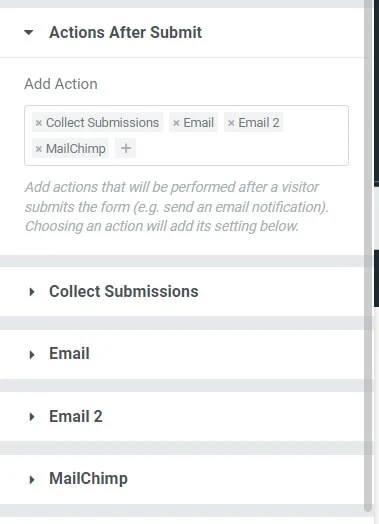
Now comes the part to integrate MailChimp.Click on the Actions after submitting tab and select MailChimp.You can save entered email addresses in your form in Elementor by selecting collect submissions in Actions after submit.You have to select an email to receive a mail for the users who have clicked on subscribe after entering their email id.This way you will get to know their details such as email id so that you can continue your communication with them.
If you want to send a confirmation mail to the users you can select email2 in the actions after submitting.
Next click on the email field.Enter the email address on which you want to receive the email notification of users subscribing.
You can change the subject line as per your needs.
The message field will capture all the data related to the user. By default, it captures all fields. This section requires shortcodes to be mentioned for the field you want to capture.The shortcode can be known from the form field area. Click on the field and then select the advanced tab and there you will find its shortcode. You can copy the information from there.
In the From email field, you need to copy the email shortcode so that you get to know the email id of the user. You can paste the shortcode obtained from the steps above and paste it here.
Like here you can mention
“[field id=”email”]”.
Do not enter the outer quotes here. From Name and Reply to field can be kept same or you can change it as per your liking.
Select the metadata that you want to be captured for the users subscribing.
Select send as HTML.

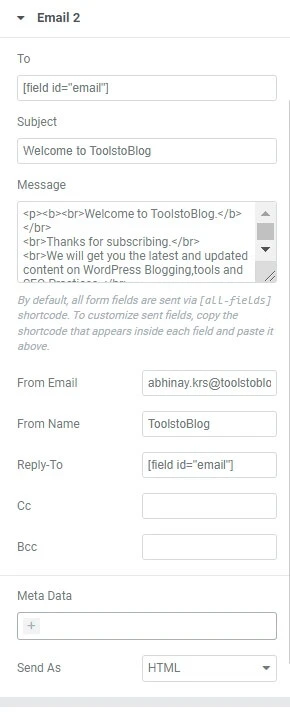
Now if you want to send a confirmation email to the users who have subscribed, you can do sofrom email2 tab.In the To email field copy the shortcode of the email id form field.It will capture the email id of the user to whom the confirmation mail is to be sent.Here enter “[field id=”email”]”.You can put your subject line in the subject field.In the message field, you can paste the custom HTML code that you want to be sent to the user.Like here you can put something like this
“<p><b><br>Welcome to Example.com.</b></br>
<br>Thanks for subscribing.</br>
</p>”
In the From email field enter the email id from which you want to send the mail.Put the From name. In the Reply to the field, you can keep it as the shortcode of the email id of the form field.Select send as HTML.So you are done with the confirmation mail.
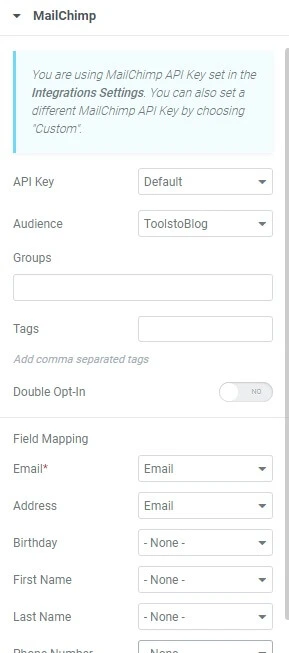
Now comes the part of Mailchimp integration.As you have earlier already registered your MailChimp with Elementor, You can select the API key as default.You can create a different API key for different campaigns if you have another API key for the same.
Select your campaign from the audience list.You can select double opt-in if you require that.Then you need to map the respective fields.
The only email id field is mandatory which you need to select email id.
Now you can style your form from the Style tab and you are done.Mailchimp is integrated into Elementor. Click on publish or update and test your changes.Enter an email id in the live form and check whether it’s getting captured in Mailchimp All contacts section.You can also check whether that email id receives a confirmation mail.Also, you need to check on your email id if you get notification mail for this subscription.
MailChimp integration in a popup in Elementor is also the same as explained above. All the fields are the same and you can apply the same settings.In the screenshot below you can see all the fields are the same and a popup is just a form.
The only difference is where and when you want to display your popup.So this is all about MailChimp integration with Elementor. Do let me know in the comments section how do you like it.
1 thought on “How To Integrate MailChimp in Elementor”
Thanks Jake
Comments are closed.